.png?width=688&height=153&name=AWS%20RedShift%20(1).png)

To log in to AWS RedShift in Dataslayer, you need 6 fields that you can find in the Amazon console:
- Host
- Port
- User
- Password
- Database
- Schema
To find this information, follow these steps:
1. Log into Amazon Console and go to Amazon console > Amazon Redshift > Clusters > Specific cluster in which you want to insert the data.
2. Here you will find almost all the information needed to log into AWS RedShift in Dataslayer. Copy the following information: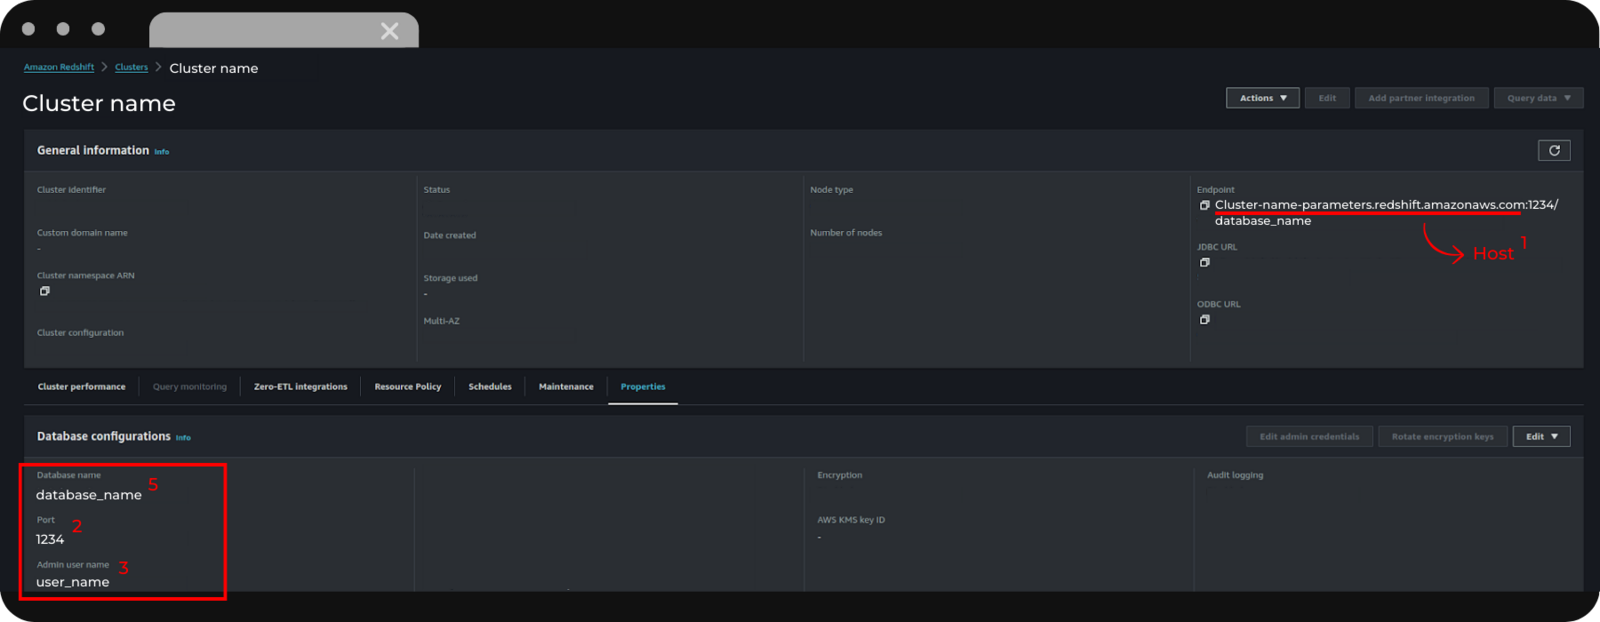
- 1. Host: The first part of the endpoint, up to the colon (not including them).
- 2. Port: The four numbers found in the Database configurations.
- 3. User: You will also find it under Database Configurations, but you can select the user of your choice.
- 4. Password: This password (not shown in the image above) is your user's password (the one chosen when the database/user was created).
- 5. Database: The database name found in the Database configurations
3. Finally, to find the Schema enter the database in which you want to insert the data. Once there, select the schema where you want to insert the data and copy its name.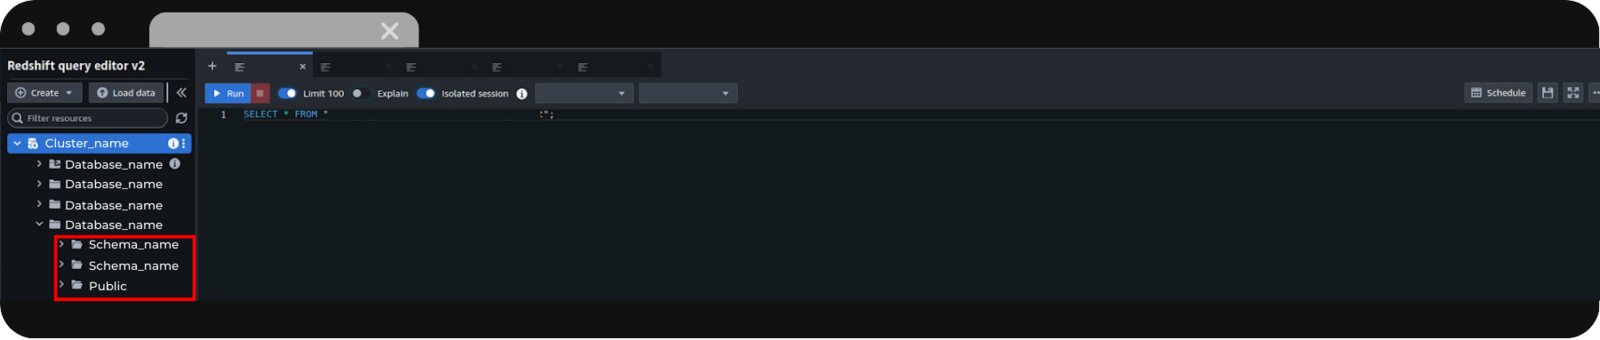

1. Log into the Dataslayer website.
2. Once logged in, click on Amazon RedShift destination.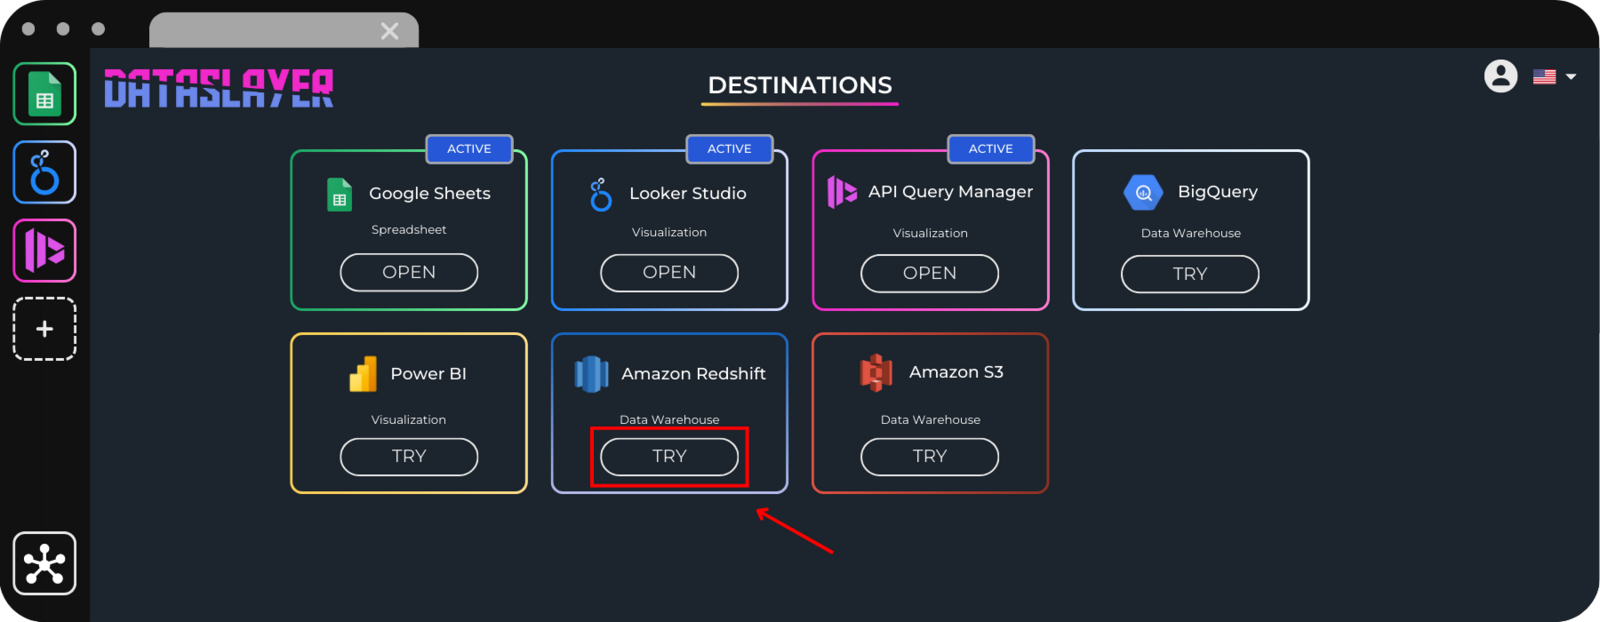
3. Click on New Transfer.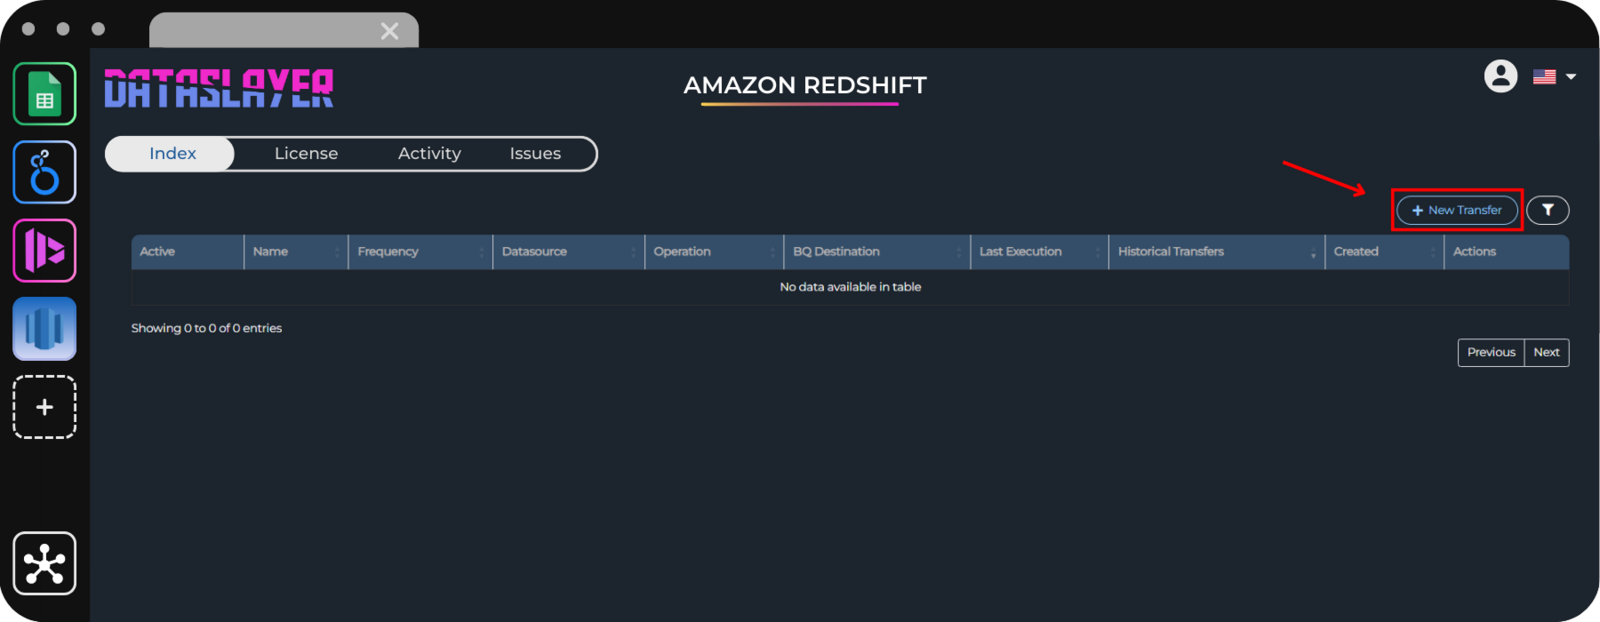
4. And then on Connect with AWS.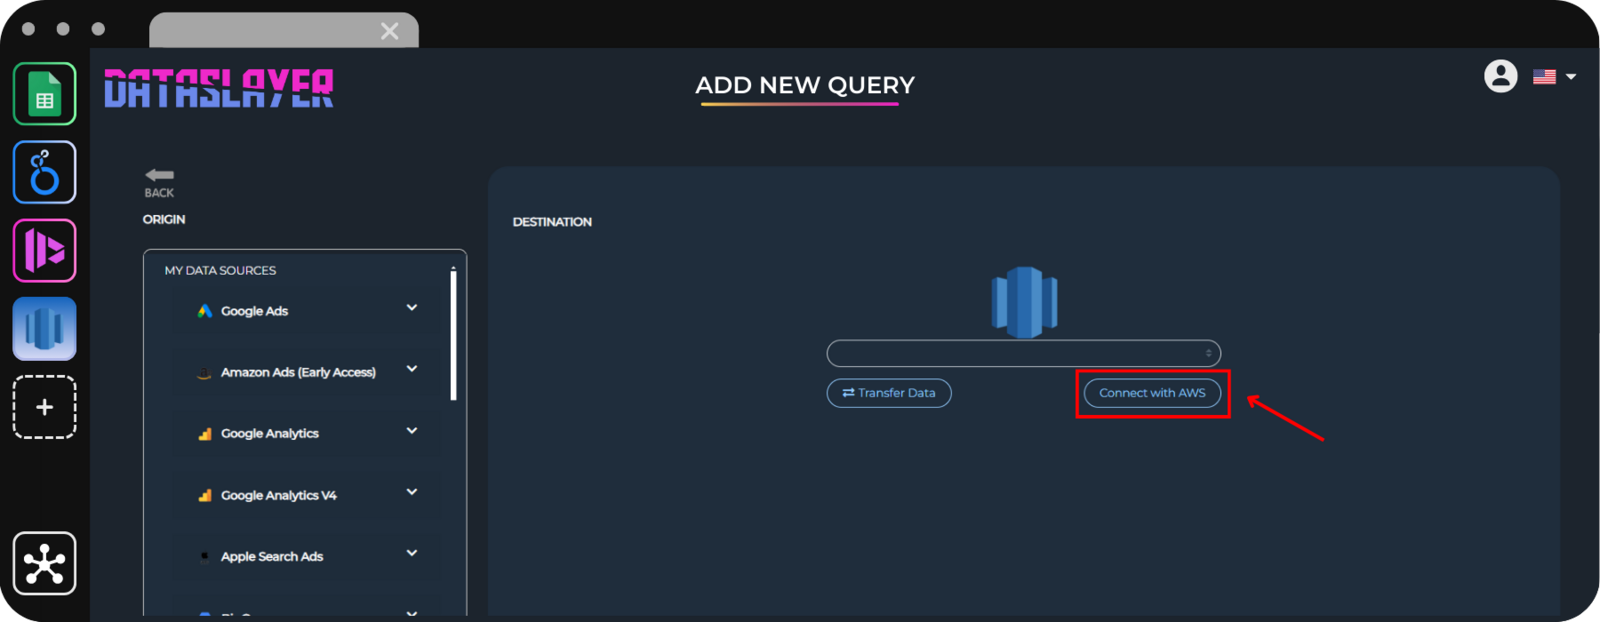
5. Paste all the previous information in the corresponding fields.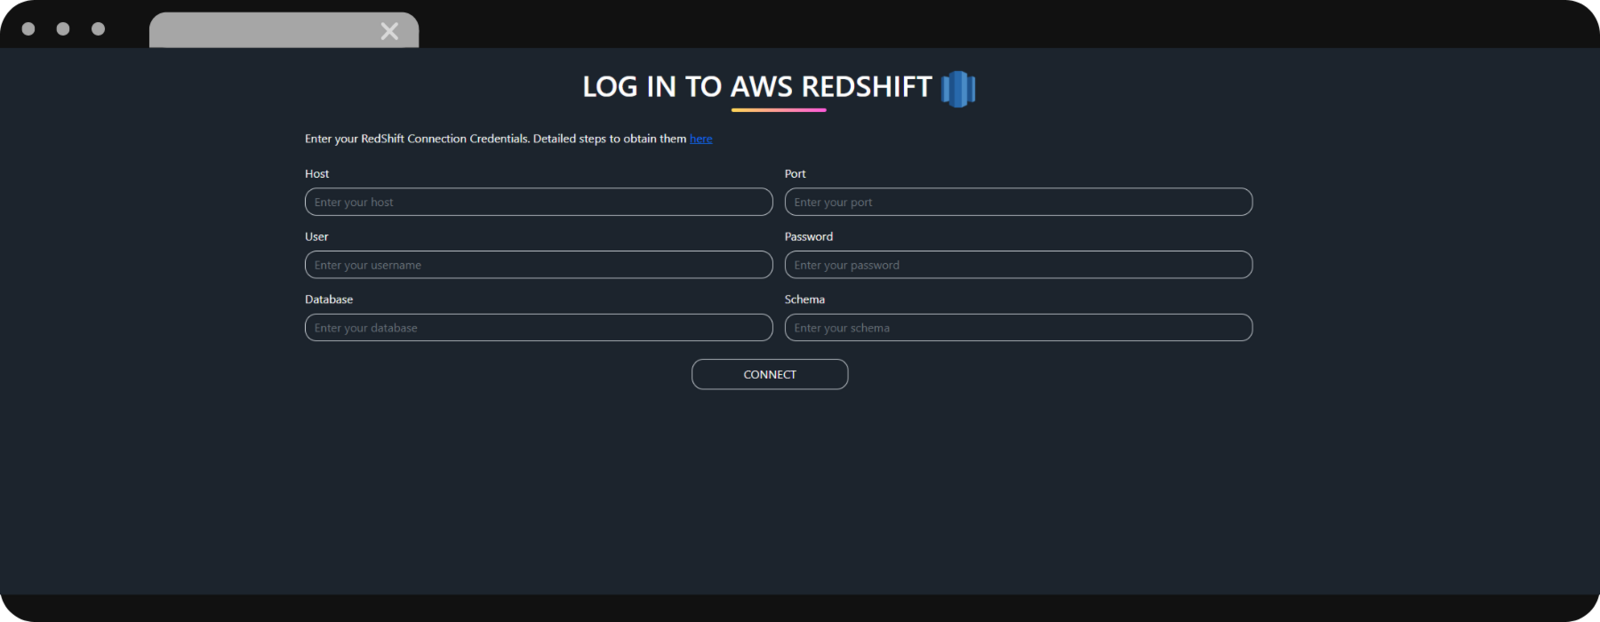
6. Done! Once you have filled in all the fields click on connect and you are successfully logged in to AWS RedShift in Dataslayer.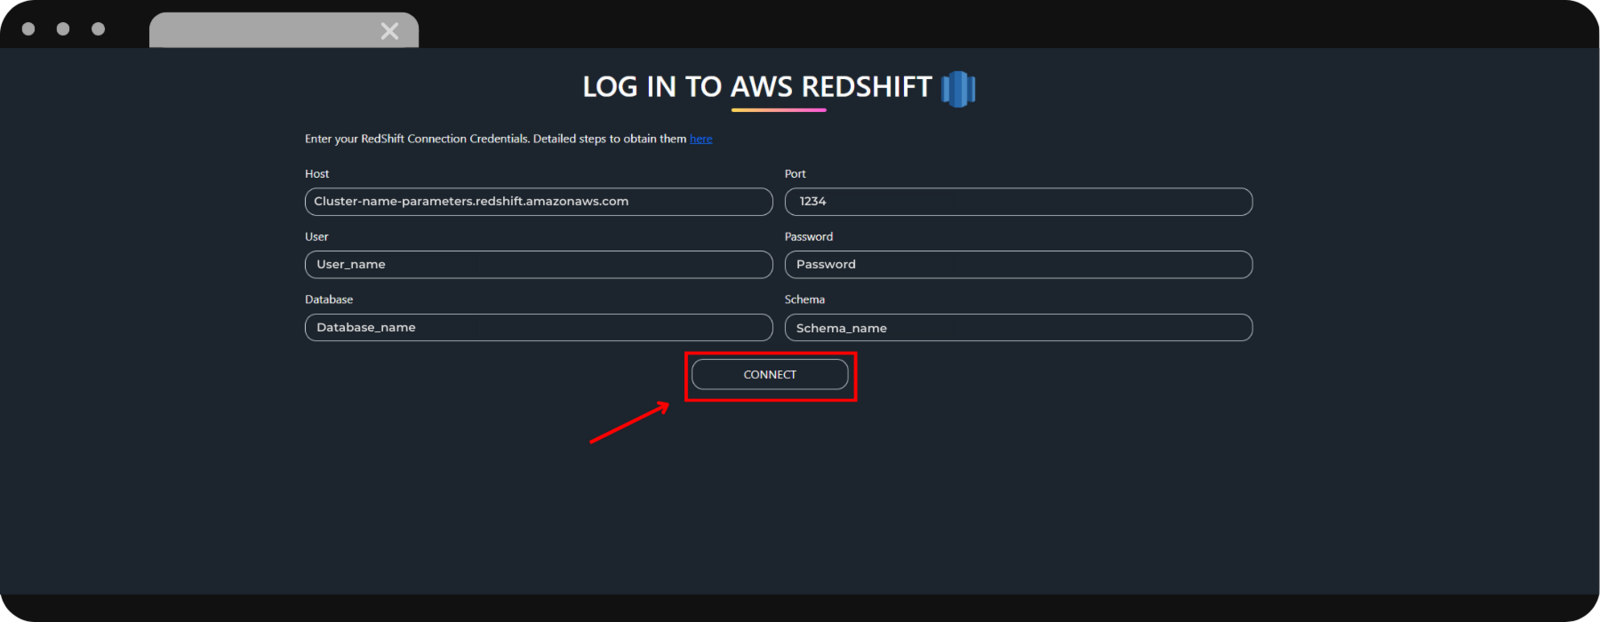
As always, please contact us via our live chat on our website or via email if you still have doubts or questions. We are happy to help!